How can you modify Revit elements using your add-ins?
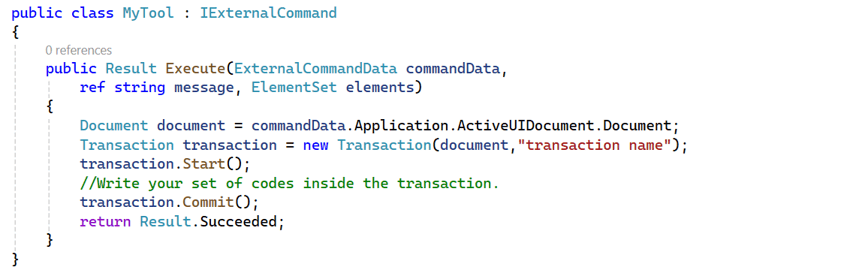
To modify any elements in Revit, we must write a set of instructions for the modification within a Transaction.
A Transaction is a class used when we need to modify elements in a Revit document. It serves as an encapsulation of changes; any instructions for modifying model elements must be written inside the Transaction. Outside of a Transaction, Revit does not allow modifications to the elements. Below is an example of how a Transaction can be used.
To write any set of instructions, you need to begin with a starting transaction, such as 'transaction.start()', and must conclude the changes with 'transaction.commit()'.
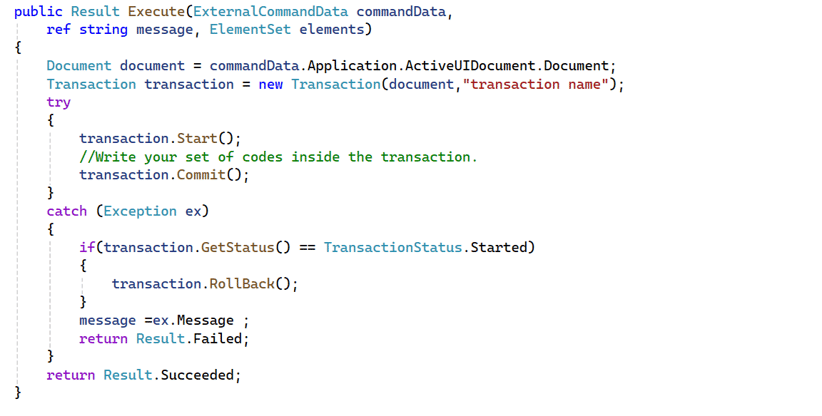
To handle any errors during the transaction, such as exceptions, how can you manage these errors to prevent Revit from crashing?
To handle errors gracefully, you can use the try-catch block to prevent any exceptions from causing Revit to crash.
Here is a snippet demonstrating how to use the try-catch block.
In the exception handling, we call `transaction.Rollback()` to undo any changes if an error occurs. We include the error message in the response of the external command and return a result indicating failure. If an exception does occur, we return `Result.Failed` to signal that the external command did not execute successfully.